Configure Dashboard
The Dashboard is a great tool that will help you configure relevant data to be shown in the Dashboard screen. The presentation of data on this form can be organized in such a way that you will not be digging around anymore through different forms or reports, instead see at a glance the current significant figures relating to your business activities and processes, e.g. Receivables, Payables, Sales, Expenses, etc. This also gives you a quick way to assessed your current financial standing all in a single form. By default, there are about 40 pre-defined grids and charts (tabular and graphical) you can use to start with. You can also create your own as you may feel necessary.
The following will explain in detail how you can manage/configure your Dashboard screen.
There are three Dashboard menu items i.e., Dashboard, Dashboard Setup and Dashboard Panels.

DASHBOARD
Dashboard can be accessed from the Accounting Menu > Dashboard. The Dashboard interface presents the different panels on either chart or grid form.

DASHBOARD SETUP
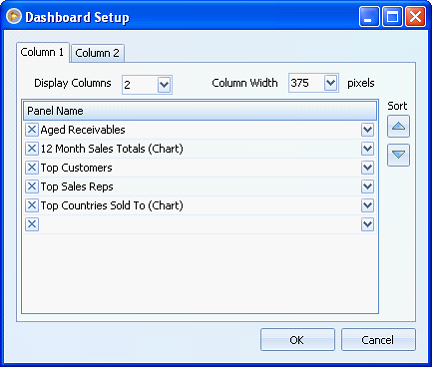
The Dashboard Setup form will allow you to arrange the panels to display them on the Dashboard according to your preference.
1.Display Columns field – will set the number of columns on the Dashboard.
2.Column Width – will set the width of each column on the Dashboard in pixels.
3.Column Tabs – number of tabs will depend on the set number of columns in the Display Columns field.
4.Sort buttons – will allow you to change the position of the panels.
5.Grid – area where you can specify which panels would appear on a particular column on the Dashboard.
DASHBOARD PANELS
A Dashboard Panel displays significant figures relating to your business activities and processes. VisionCore has 40 system panels that are readily available once you install the system.
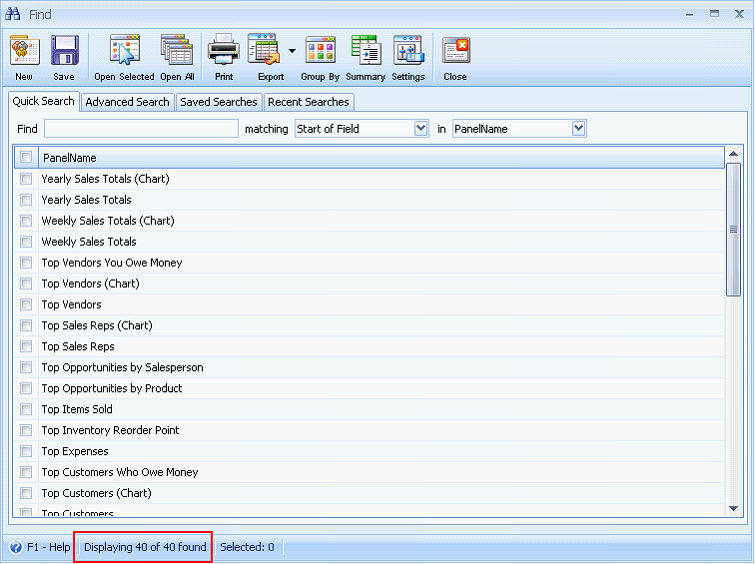
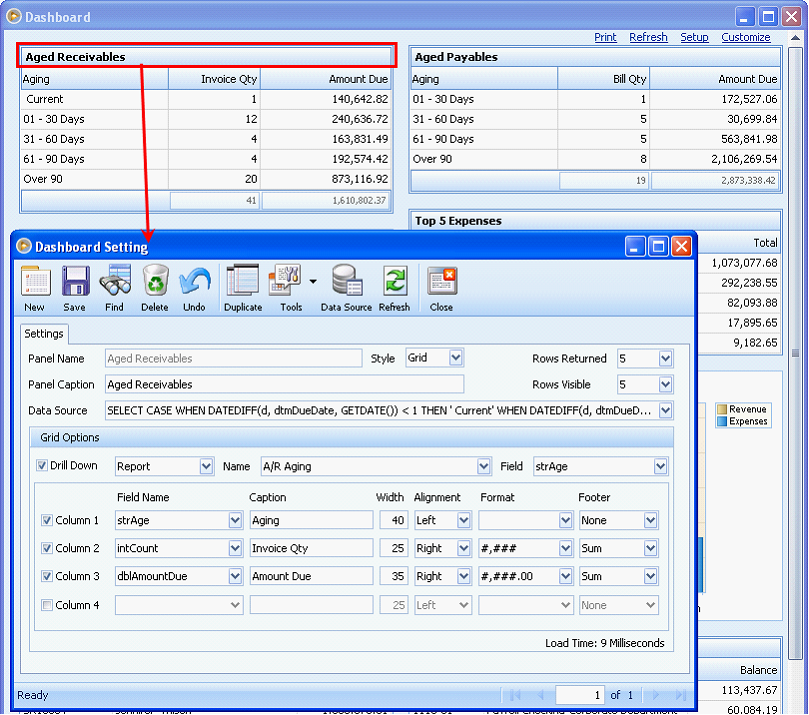
When you open a Panel form from the Find form, the Dashboard Setting form will open. This form comprises of various fields that are used to customize a particular panel. System panels are read-only and cannot be modified. See screenshot below.
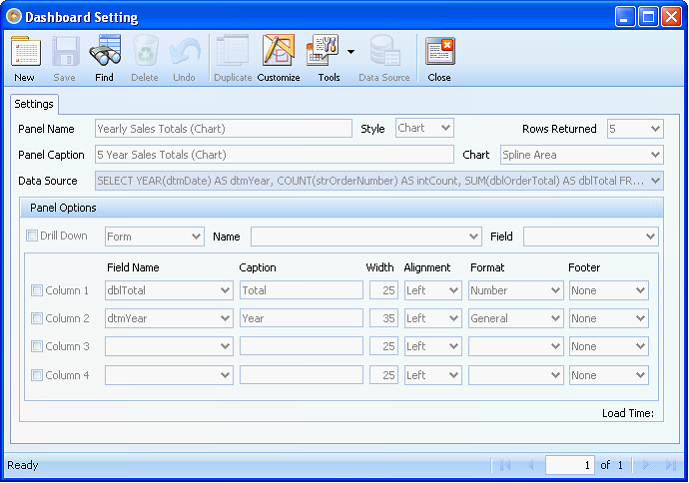
Buttons:
•New – will open a new blank Dashboard Setting form.
•Save – will save the changes made on the form
•Find – will open the Find Panels form
•Delete – will delete the current form
•Undo – will revert any changes made on the form from the last time that it was saved
•Duplicate – will create a new copy of the current Panel
•Customize – this will be enabled on system panels only. Clicking this button will create a duplicate of the current panel.
•Tools – will open another menu that will show two buttons, Import and Export.
![]() Import – will import the panel components into an xml file
Import – will import the panel components into an xml file
![]() Export – will export the panel components present in an xml file into the Dashboard Setting form.
Export – will export the panel components present in an xml file into the Dashboard Setting form.
•Data Source – will open the Dashboard Panel Data Source form
•Close – will close the form
User panels are those panels used on the dashboard and can be edited or customized. Clicking Customize on the upper right of the dashboard will open the Find Form listing down all the panels that are present on the dashboard.
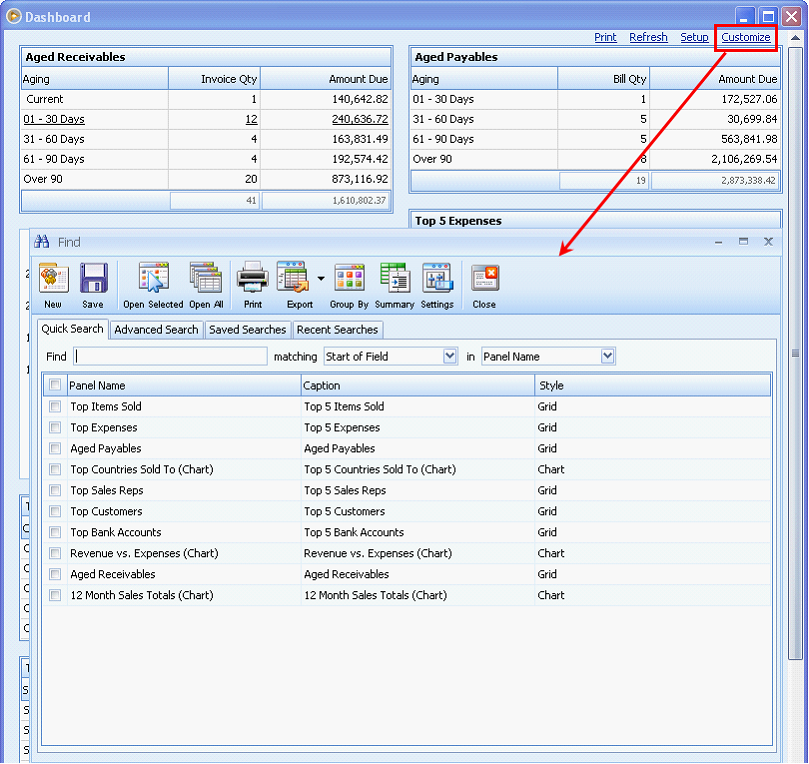
To customize a panel, you may simply double click on the panel name in the Find form, or click on the Panel Caption to open the Dashboard Setting form.
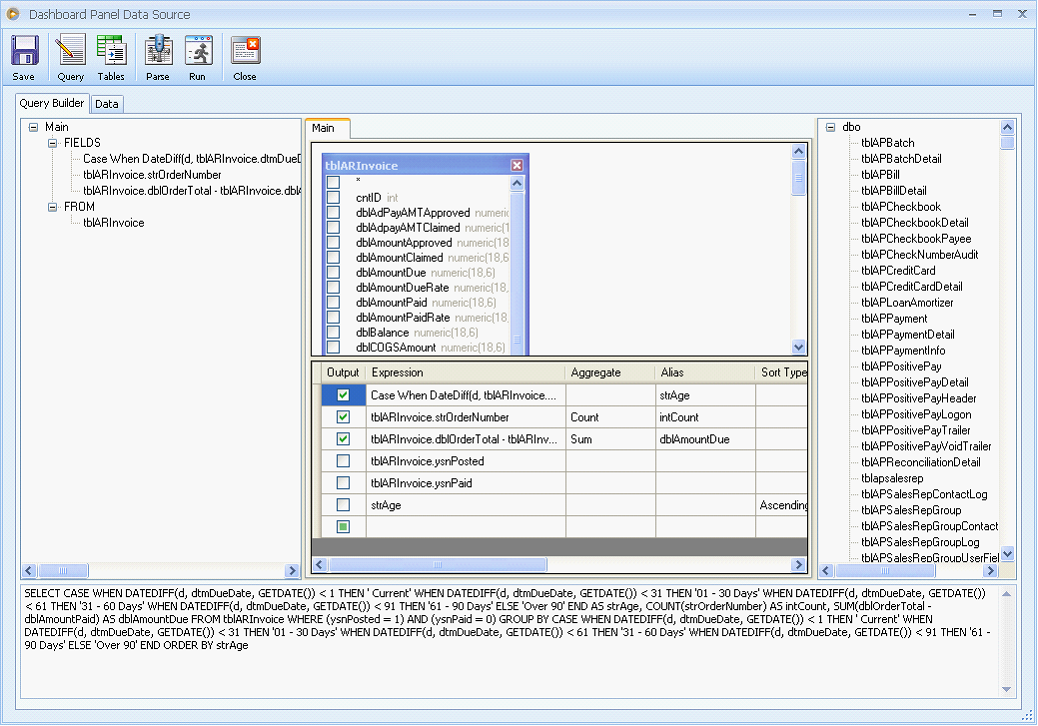
Dashboard Panel Data Source form can be opened from the Dashboard Setting form > Data Source button.
Buttons:
•Save – will save the changes made on the form.
•Query – will display Query on a tree list form.
•Tables – will display all the tables present on your database.
•Parse – will execute the Query and display the output broken down on a table form.
•Run – will execute the Query and display the preview of data that will be displayed on the panel.
•Close – will close the form