I. Jobs
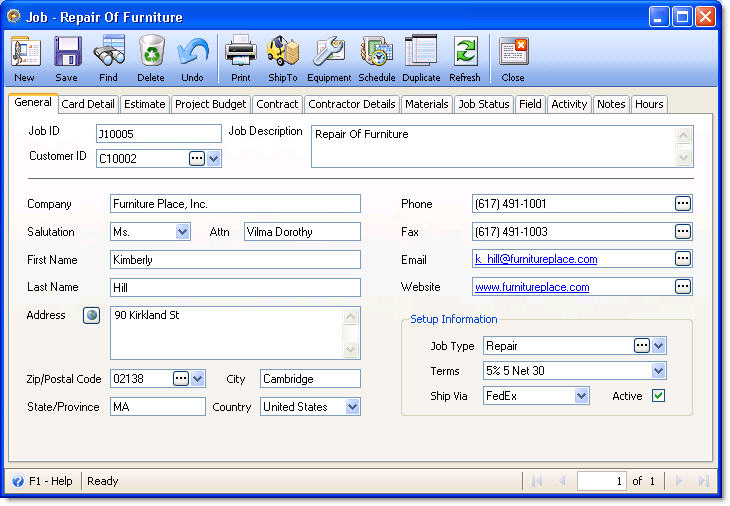
1. Create new Job. Job form can be opened under Contacts menu, then select Jobs. Enter necessary information in General tab.
2. Enter necessary information in Card Detail tab - Proposal Information area.
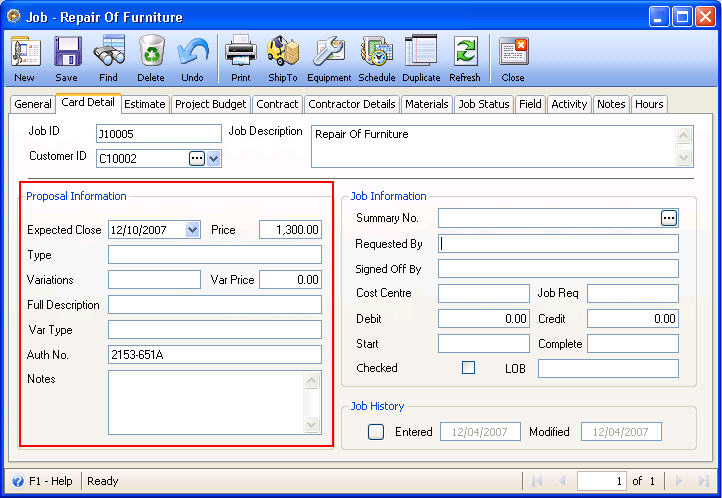
Enter information as needed in the Proposal Information area.
![]() Expected Close - date when a Job is expected to be finished
Expected Close - date when a Job is expected to be finished
![]() Type – Type of proposal
Type – Type of proposal
![]() Variations – the user types here any type of variation related to the proposal.
Variations – the user types here any type of variation related to the proposal.
![]() Var Price – the amount of the variation
Var Price – the amount of the variation
![]() Full Description – description of the proposal
Full Description – description of the proposal
![]() Var Type – the type of variation of the proposal
Var Type – the type of variation of the proposal
![]() Auth No. – authentication code indicated in the proposal
Auth No. – authentication code indicated in the proposal
![]() Notes – additional notes that goes with the proposal
Notes – additional notes that goes with the proposal
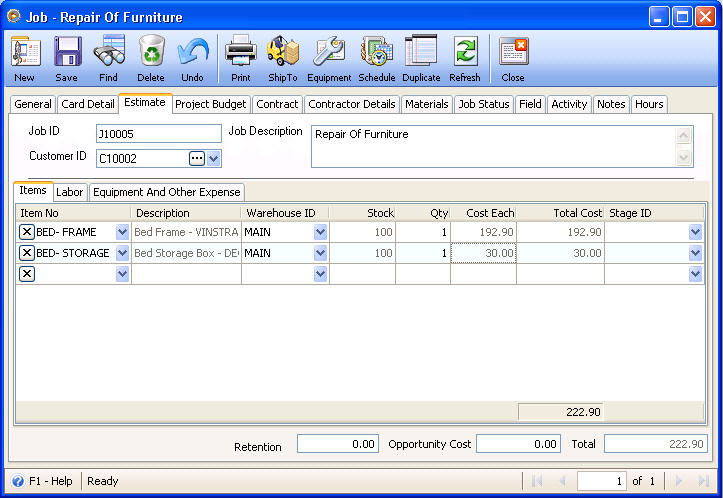
3. In the Estimate tab enter items estimated to be used for the job, the labor costs and other costs estimated to be incurred for the completion of the job.
Items tab
Select an item to be used for the job in the combo box list. If the item needed for the job is not yet in the list, add that item first into your inventory before that can be selected here.
To add an item to your inventory list, go to Inventory menu and select Inventory. You will be brought to the Find Inventory form. Click the New button at the upper left hand corner of the form to open a new inventory item form where you can start entering item’s information.
Enter how many of that item is needed for the job in the Quantity field.
Labor tab
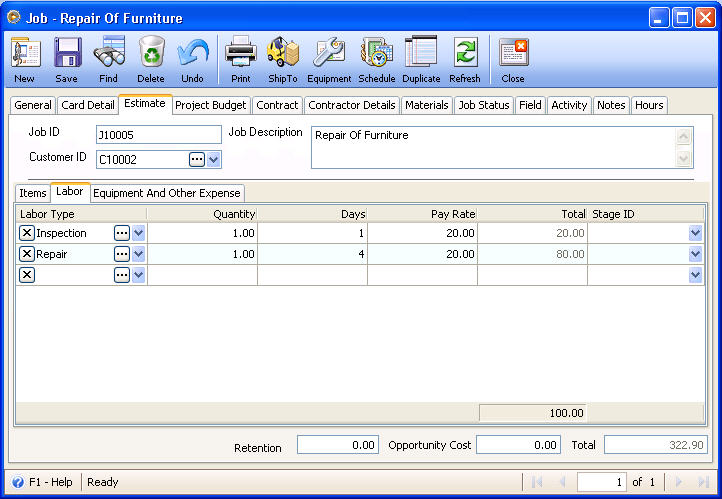
In the Labor tab, select the labor type needed for the job. If the labor type is not yet in the list, click the ellipse button in the Labor Type field. This will open the Type form where you can add labor types.
Enter the Quantity and Days needed for that labor type and its Pay Rate.
Equipment and Other Expense tab
Select the equipment or other expense needed for the job. If the equipment or other expense is not yet in the list, click the ellipse button in the Equipment Expense or Other Expense field. This will open the Expense form where you can add equipment and/or other expenses.
Enter an amount of that expense in the Amount field.
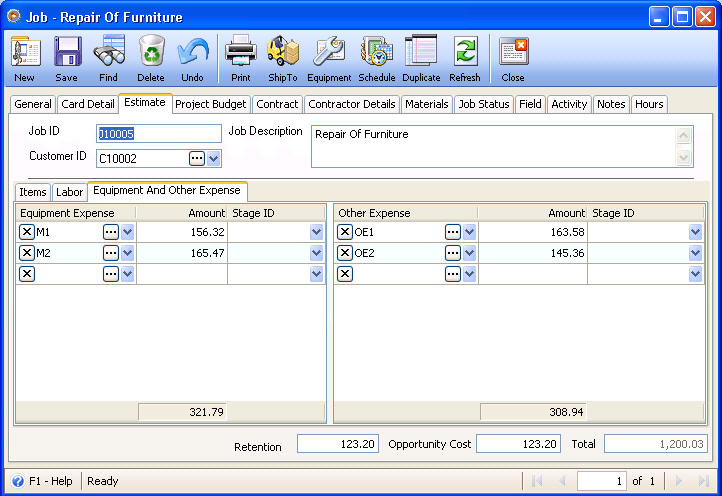
Enter Retention Cost and/or Opportunity Cost if you have it.
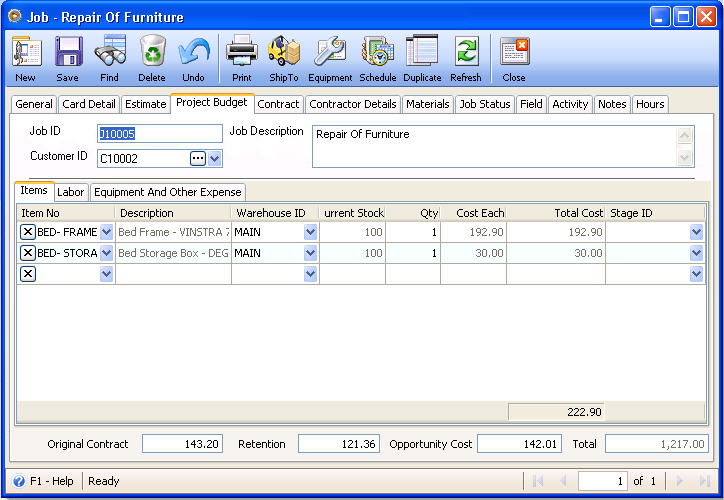
4. Move to Project Budget tab. Almost all information entered in the Estimate tab is carried over into this tab so you will not have to enter that information twice. You can change any field in this tab as necessary.
Enter Original Contract amount if you have it.
![]() Note that if you want all information entered in the Estimate tab be carried over into the Project Budget tab, you must not save the job record unless all information needed in the Estimate tab is completely filled out. It is during the first time the record is saved, where information from the Estimate tab is carried over to the Project Budget tab.
Note that if you want all information entered in the Estimate tab be carried over into the Project Budget tab, you must not save the job record unless all information needed in the Estimate tab is completely filled out. It is during the first time the record is saved, where information from the Estimate tab is carried over to the Project Budget tab.
5. There is a Job Equipment form that you can use to enter equipment/s needed for the job that is loaned. You can open this form by clicking the Equipment button in the toolbar.
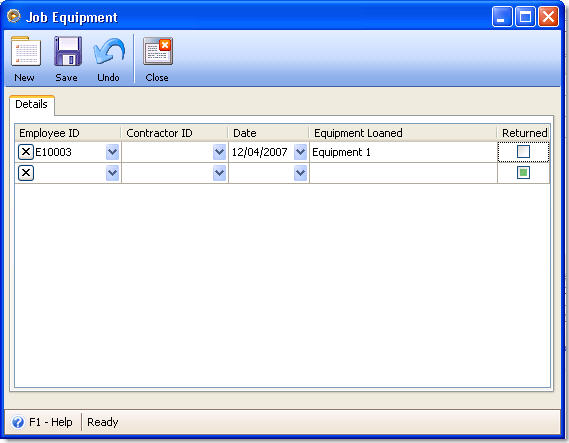
In the Job Equipment form, you will have to select either Employee ID or Contractor ID, then the Date and Equipment loaned. There is also a Return checkbox that you can choose to mark with a check when equipment loaned is returned.
6. In Job Status tab, each field allows the user to specify what part of the job it is currently on and the date associated to each progress.
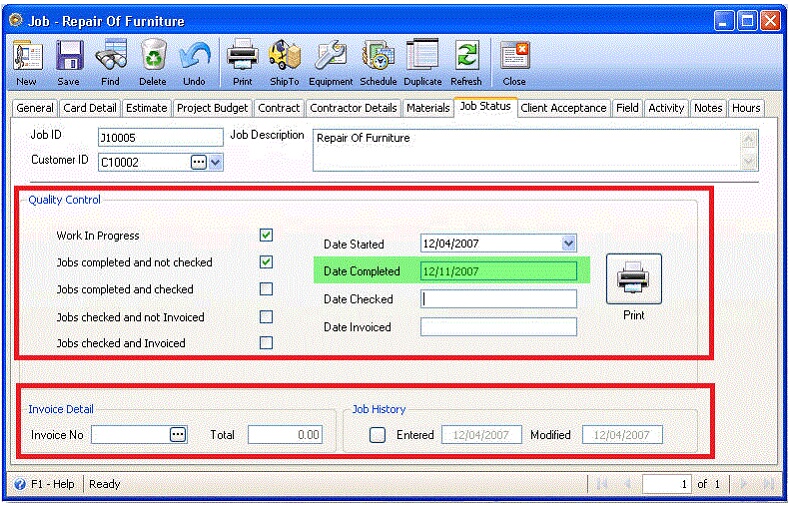
Invoice Detail shows the last sales invoice transaction posted for the related job.
Job History - the fields on this box shows the date when the job was created and the date when the job record was last modified.
7. In the Field, Activity and Notes tabs, enter any information if you have it.
Move to the next topic: Chapter II : Job Project