XIII. Jobs Invoice
To create a jobs invoice, go to Contacts menu > Project Management > Jobs Invoice. You will be brought to the Find Invoices form. Click the New button at the upper left hand corner of the form to open the Find the Job for this Jobs Invoice form.
![]() Take note that only jobs set as Contract/Sub Contract (in Jobs form – Contract tab) will be displayed.
Take note that only jobs set as Contract/Sub Contract (in Jobs form – Contract tab) will be displayed.
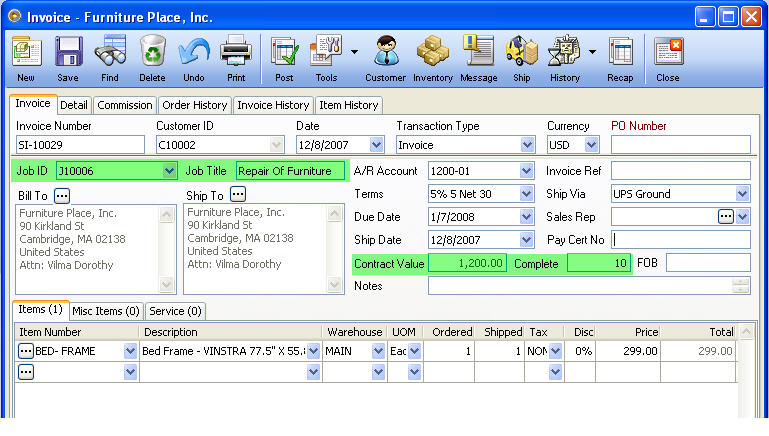
Select a job to bring you to the Jobs Invoice form. This transaction works like a standard Invoice in VisionCore, the only difference is it specifically involves a job. You will notice that this form is filled in with information from the selected job like Job ID, Job Title and Contract Value. So once a Job Invoice is created, any items chosen on the Job Invoice form will have an effect on the Inventory forms.
The Complete (in percent) field is where you can enter a value that indicates how many percent will be added to the total percentage progress of the job. This same percentage will also be shown in the Recovery of Advance field.
Enter items for the job in Items tab.

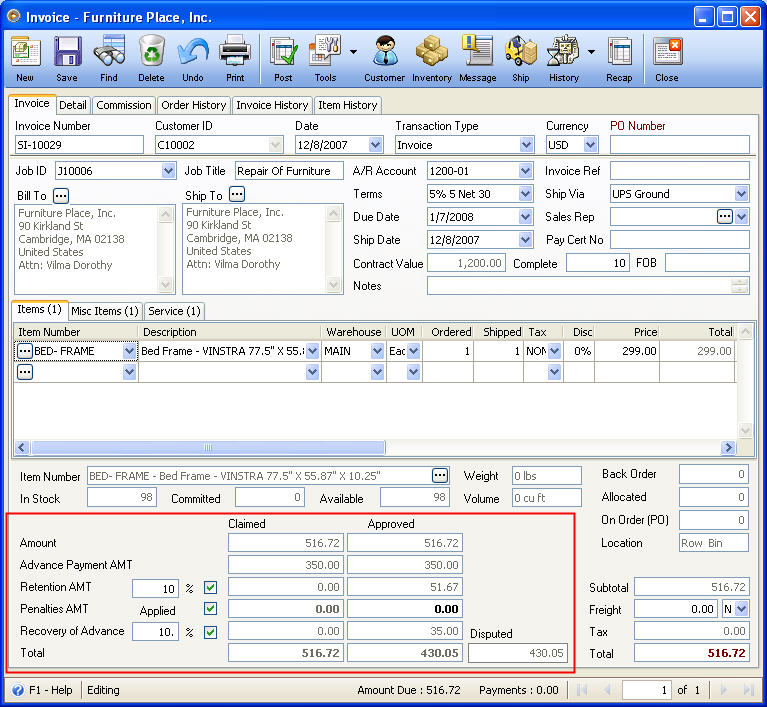
Enter additional costs incurred for the job in Misc Items and Service tabs. On each of the line item here, you will have to assign a Project Clause. Click the Ellipse button in the Quantity field (Misc Items tab) and Hours field (Service tab) to assign a project clause. Project Clause will be discussed in the following sections of this documentation.


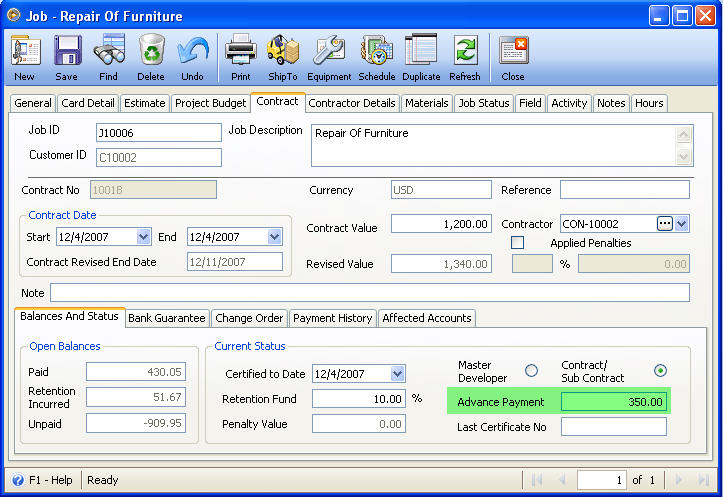
Other fields like Retention Amount (in percent), Penalties Amount, Recovery of Advance (in percent) fields are user input fields where you can enter/modify the value as necessary. Approved amount for Recovery of Advance is computed as Recovery of Advance percentage multiplied to the Advance Payment entered in Contract tab.
Then post this invoice.


Move to the next topic: Chapter XIV : Project Clause