Create a Custom Chart of Accounts
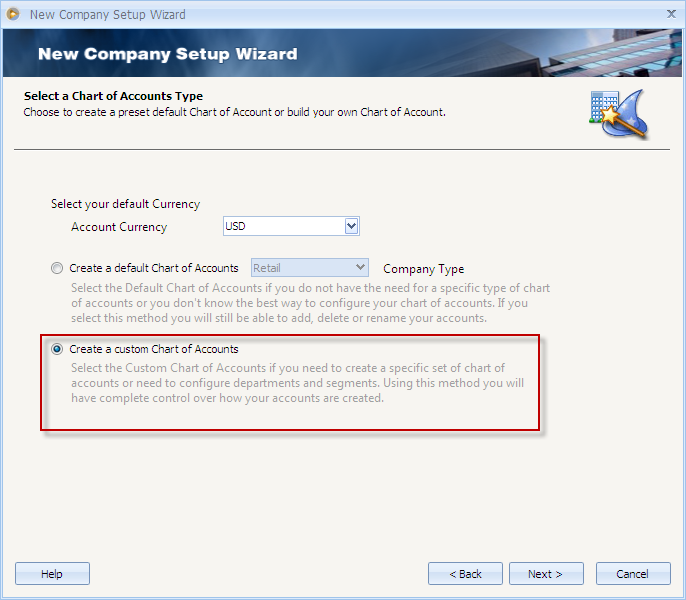
This option enables you to customize each account to suit your own business needs. When this option is selected and you click the Next button, you will be brought to the Create Segment Structure form, which is the first step in creating your Chart of Accounts.
I. Create Segment Structure
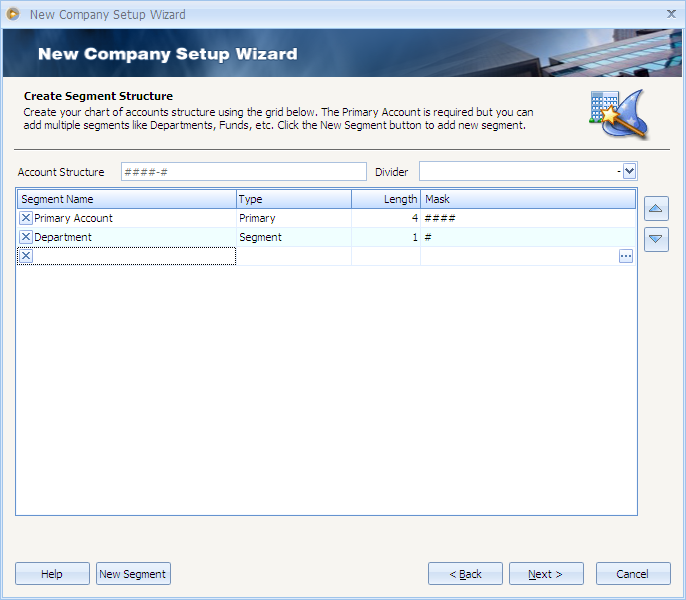
Creating your Segment Structure is the first step in building your General Ledger Chart of Accounts. This form enables you to define a specific structure in terms of number of characters, what type of character to use for a primary account, segment, division, or another term you may wish to use.
When setting up your Chart of Accounts it is important to properly name and structure your accounts to take full advantage of VisionCore's power in segmenting your general ledger. This will allow you to have multiple departments, divisions, or even companies within the same VisionCore data file.
![]() Make sure when you are setting up your account structure, you set up your separator and/or hyphen and use the up and down arrows to position your separator in the appropriate location. This will be called Structure type "Divider".
Make sure when you are setting up your account structure, you set up your separator and/or hyphen and use the up and down arrows to position your separator in the appropriate location. This will be called Structure type "Divider".
1. The Account Structure field will display a read-only account structure mask to help you visualize what the accounts will look and be like when they are created.
2. The Divider combo box accepts a maximum of one (1) character and is defaulted to a dash (-). When you click on the dropdown combo box arrow button beside this field, a pre-defined characters like dash, period, underscore and space will be shown, with the ability for the user to manually enter any character. Null/Empty value is also accepted on this field in case the user does not want any divider. This is represented by the option (none). This is different from (space) since a space is considered a character.
3. Name the structure in the Segment Name field. When creating new company databases, this form will have a default setup 'Primary Account' as this is the base or general part of the account, with no segment records. You may add segment records as necessary. Example of segment records would be 'Department' and 'Branch'.
4. The Type field by default, will show 'Primary' for Primary Account and 'Segment' for other segments added. When you add new segments, this field will automatically be defaulted to Segment.
5. The Length field will show how many characters the structure will have. This is be configured either by manually changing the Length value or change it in the Edit Segment Structure form > Length field. Edit Segment Structure form can be opened when you click the ellipse button on the Mask field of this form.
![]() Note: The maximum length of the entire account cannot exceed 40 characters.
Note: The maximum length of the entire account cannot exceed 40 characters.
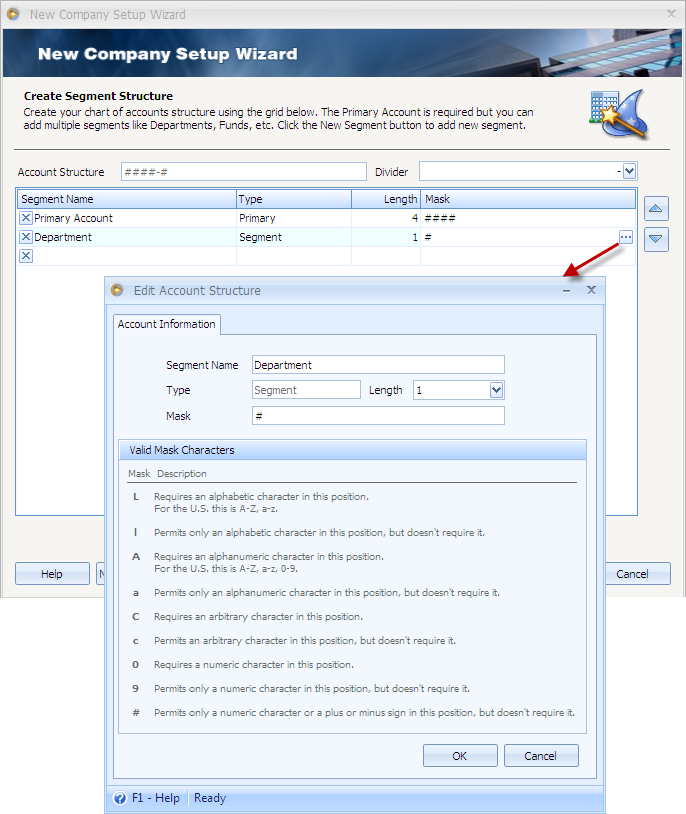
6. The Mask field will determine what type, or types of characters can be used for Account configuration. Click the ellipse button to open the Edit Segment Structure form that will give you idea on mask characters accepted by the system.
![]() You may use the delete (X) button before the structure name if you wished to change the structure name.
You may use the delete (X) button before the structure name if you wished to change the structure name.
![]() The up and down button to the right of the Mask field is used to move the highlighted item upward/downward one spot for each click.
The up and down button to the right of the Mask field is used to move the highlighted item upward/downward one spot for each click.
Click Next to move you to the next step.
II. Create Account Groups
In the Account Groups form you add and group your accounts into groups and sub groups based on how you want your Chart of Accounts to flow for each of the System Account types; Asset, Liability, Equity, Revenue and Expenses. VisionCore by default, has pre-defined set of Account Groups you can use to start with. If you need other account groups, you may use the New Group button at the bottom of the form to create an account group.
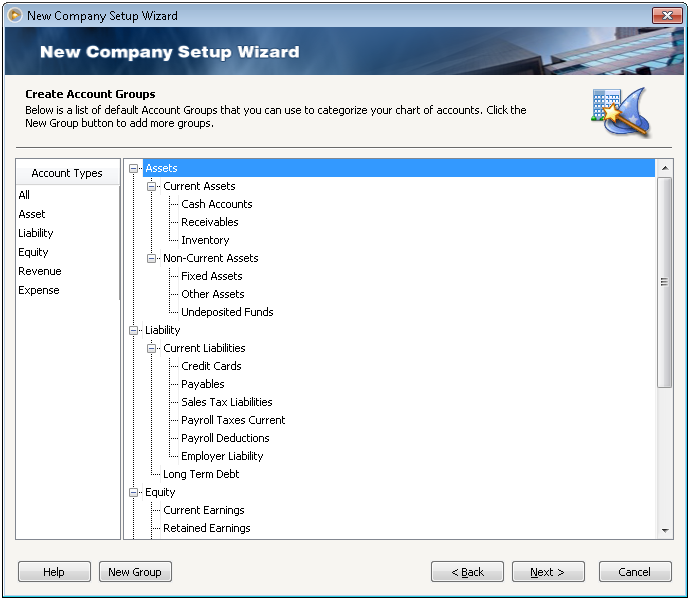
Here is a sample Account Group setup:
Account Group Sub Group
Assets System
Current Assets Assets
Cash Accounts Current Assets
As you can see, the sub group simply takes the name of the group directly above it in the flow. If you wanted to break it down even further, you could set it up as follows:
Account Group Sub Group
Assets System
Current Assets Assets
Cash Accounts Current Assets
Checking Account Cash Accounts
Payroll Account Cash Accounts
Petty Cash Cash Accounts
Click Next to move you to the next step.
III. Create Segment Accounts
This form is where you set up your main or primary accounts and other segments and assign them a description and a corresponding code.
To add accounts to your Primary Account, simply click or highlight it and place your cursor to a new line where you can add a new primary account. To edit existing accounts, simply type the correction, or modification in the grid area of this form.
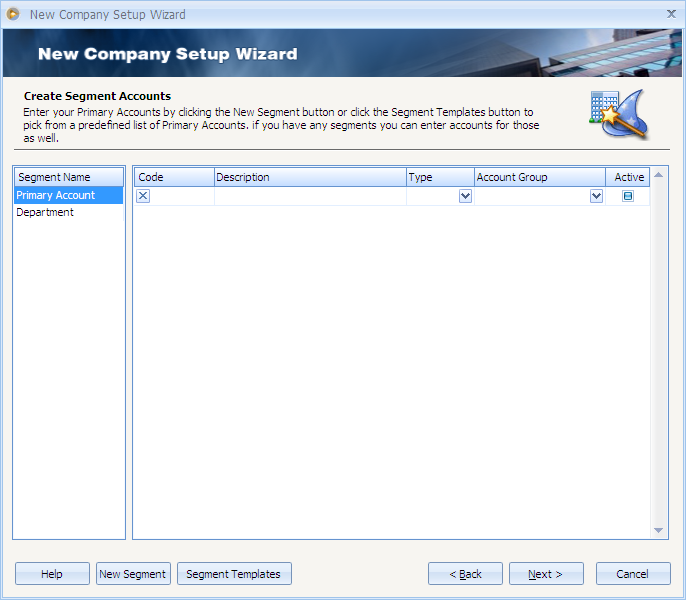
If you are getting started and would like to use a default set of primary accounts based on your type of business, you can click on Segment Templates button. This will open the Import Primary Accounts form and will give you a selection of templates to choose from. You may also use the Import, Export and Templates buttons to create new account template, edit, import or even export an account template.
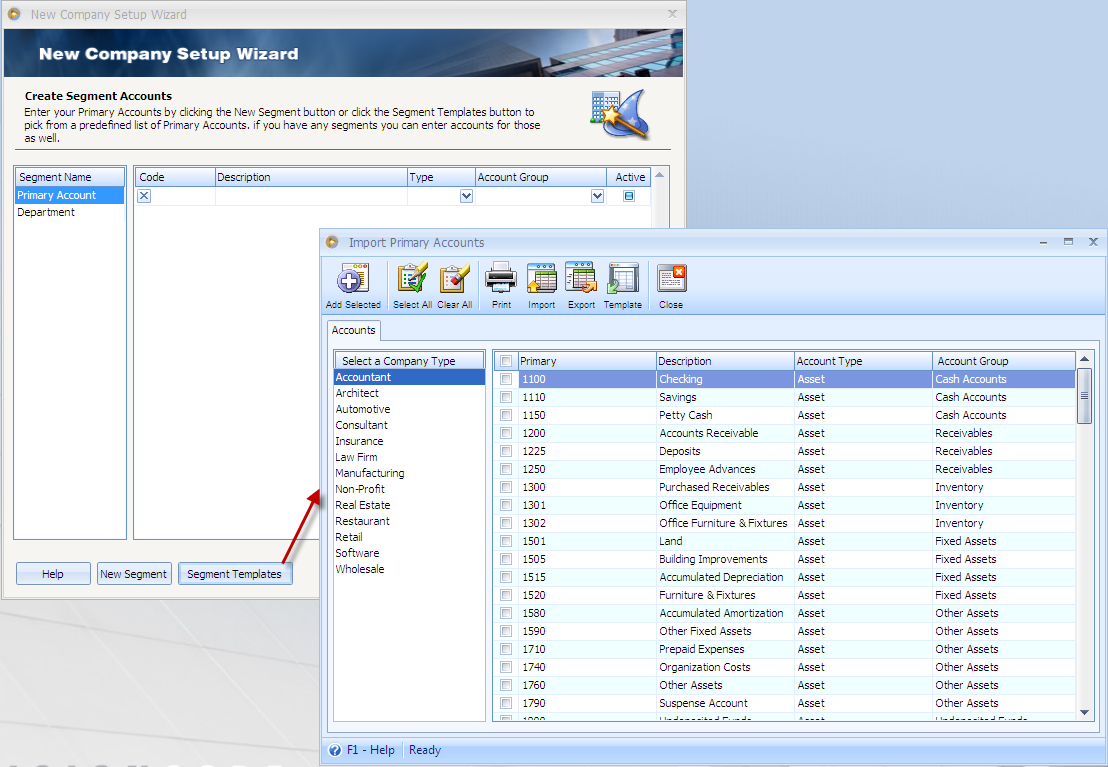
To import your own set of accounts, see Import Primary Accounts.
Let’s say you are to use VisionCore’s pre-defined list of Primary Accounts. In the Import Primary Accounts, select a template, click on Select all button and then Add Selected button.
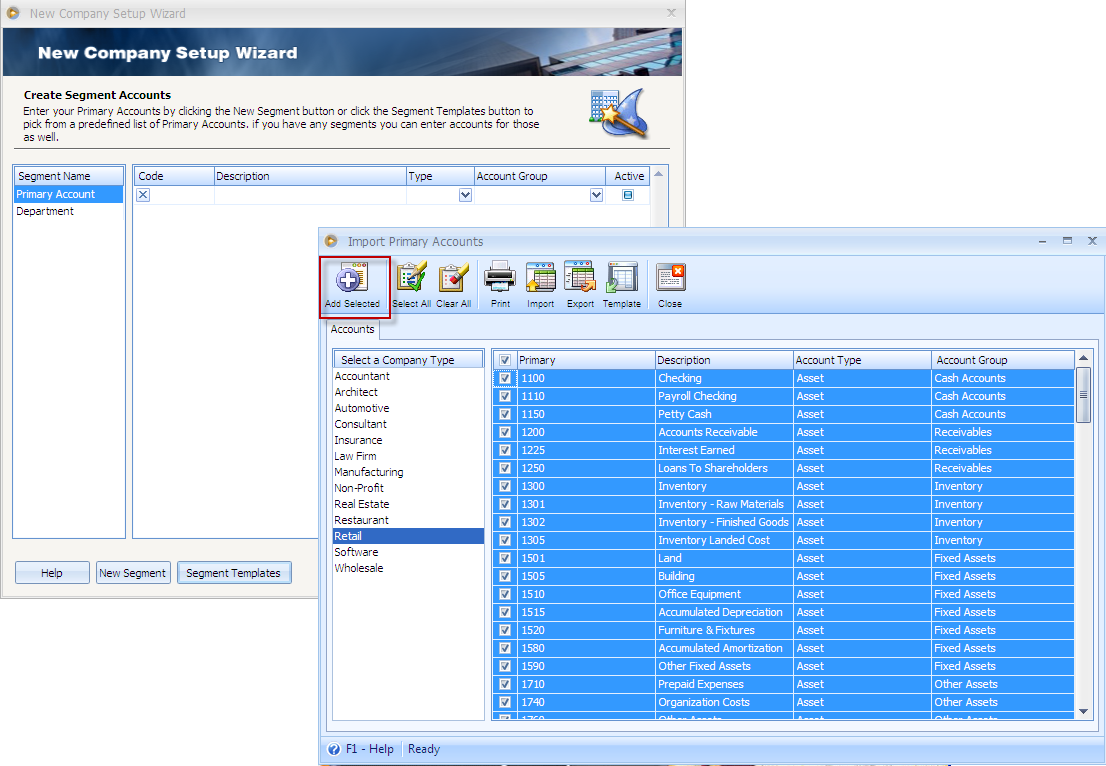
This message will then be shown. Click Yes.

And this is how it would look like after adding primary accounts.
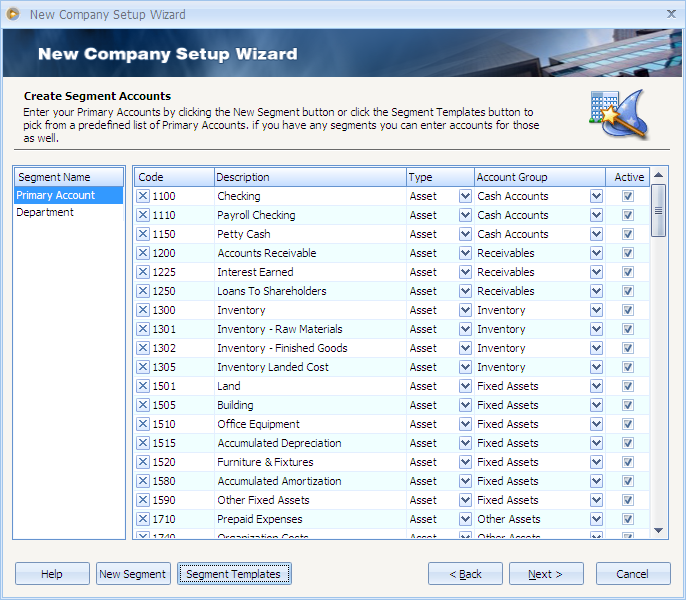
Now you can move on adding other segments' accounts. In this example, Department. To do this, simply click or highlight it and place your cursor to a new line where you can add a new segment account. To edit existing accounts, simply type the correction, or modification in the grid area of this form.
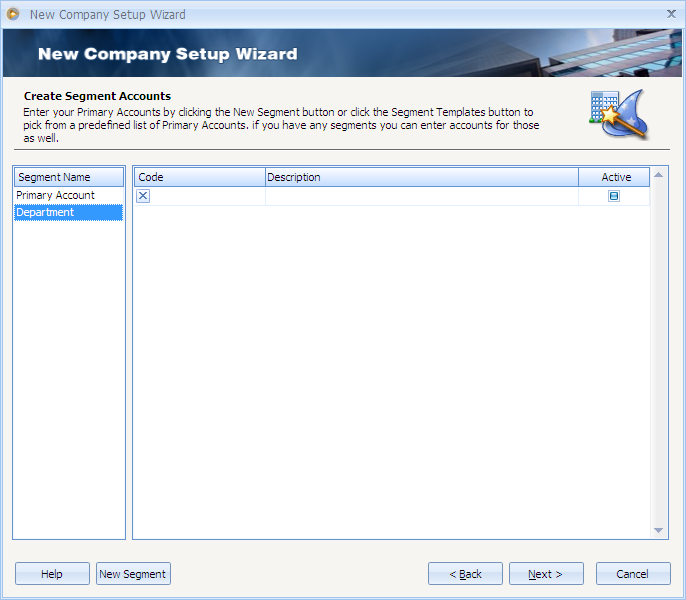
Assign the codes and descriptions you have for each segment.
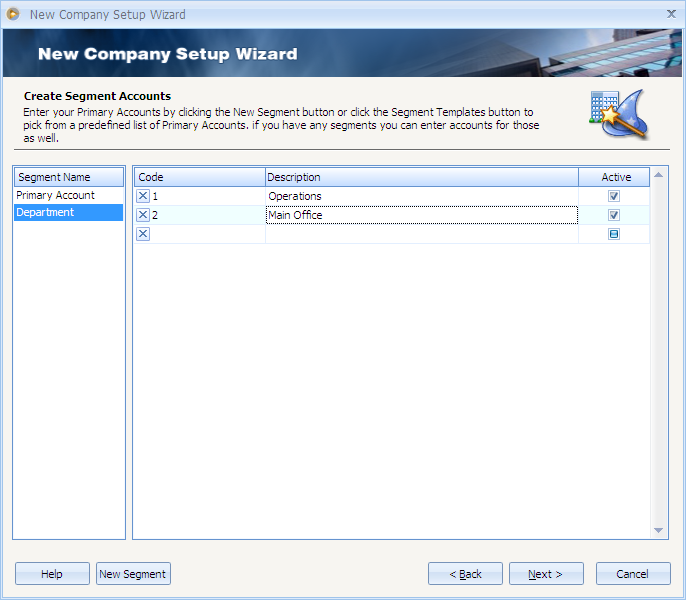
When you are through, click Next to bring you to the next step.
IV. Build Chart of Accounts
The Build Chart of Accounts form will allow you to combine some, or all of your primary accounts with some, or all of your segments. This process is fairly simple. If you want to combine all your primary accounts with all of your segments, simply click on the Select All button for each respective column. If, on the other hand, you wish to only use some primary accounts with only some of your segments, all you need to do is click on the appropriate accounts and segments and have them selected, or highlighted.
You will notice that above the primary accounts you will see your account structure mask and directly to the right of that an example account. This will help you visualize how the accounts will look when they are created.
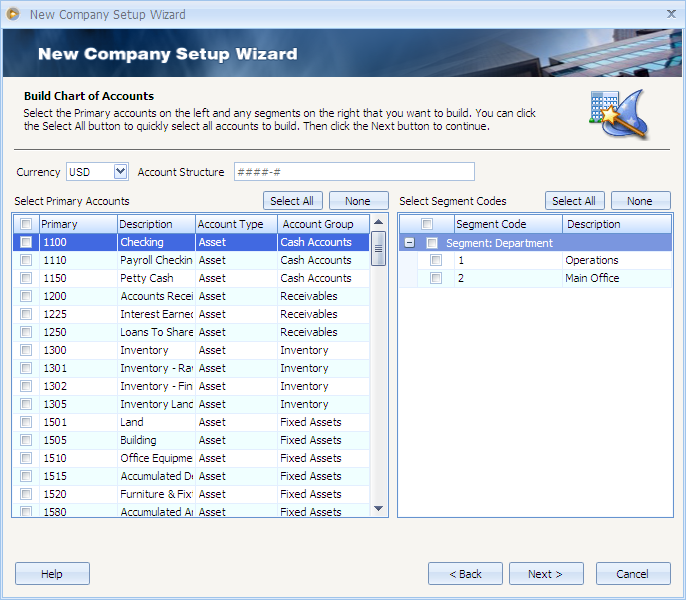
Once you have your selections highlighted, click Next to build or create your accounts.
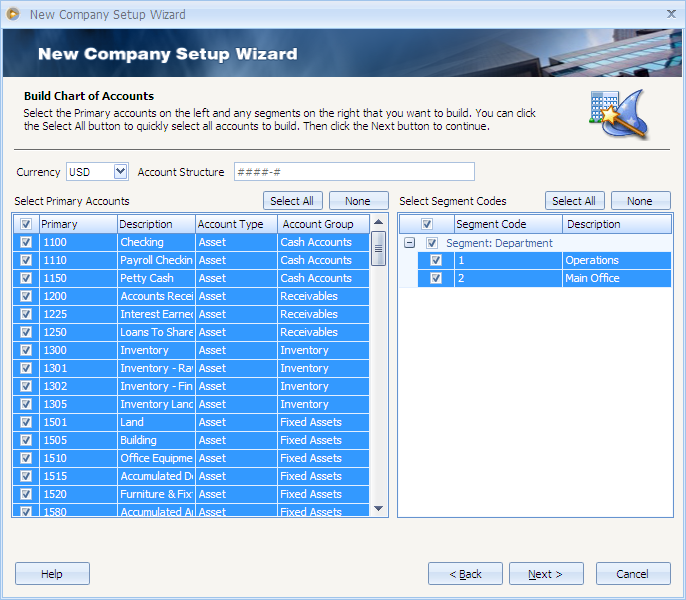
This will bring up the Commit Chart of Accounts form, which will allow you to review, change the description and ultimately add the accounts to your Chart of Accounts. Then click Next to add them to your Chart of Accounts.
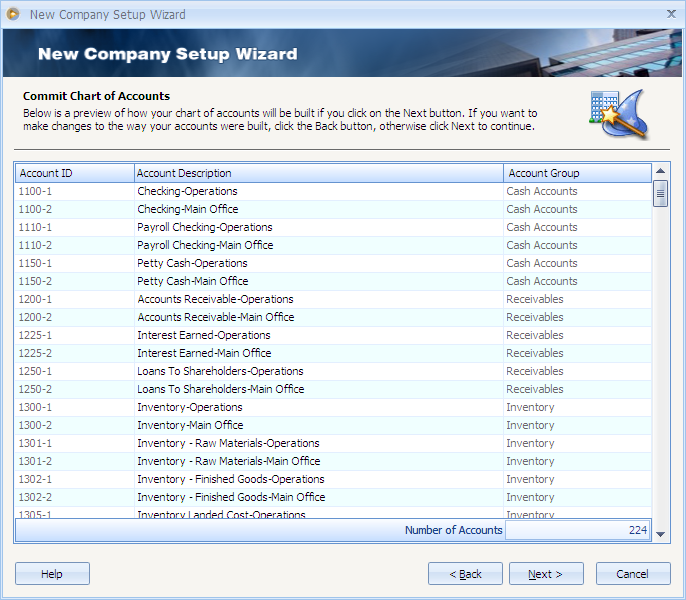
A message will be shown letting you know that accounts were successfully created. Click OK and another message will be shown asking if you want to add these newly added accounts to your default accounts.
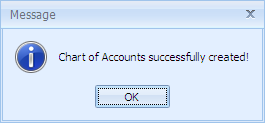
Click Yes to add the new set of accounts to your default accounts and move you to the next step of the wizard, which is Create Accounting Periods.

Click Create Accounting Periods to move you to the next topic.