Inventory Matrix Groups
The Inventory Matrix Group form will save you a lot of time if you have several Inventory Matrix Items to create. There is one predefined group created which you can edit or delete. Enter a Matrix Group name of your choice along with a description and sort order. Then click the little red New Type button next to the Type list box to enter new types or click the Delete Type button to delete types you do not want to use. The New and Delete buttons at the bottom of the Inventory Matrix Group form will either create a new Group or delete the entire selected group.

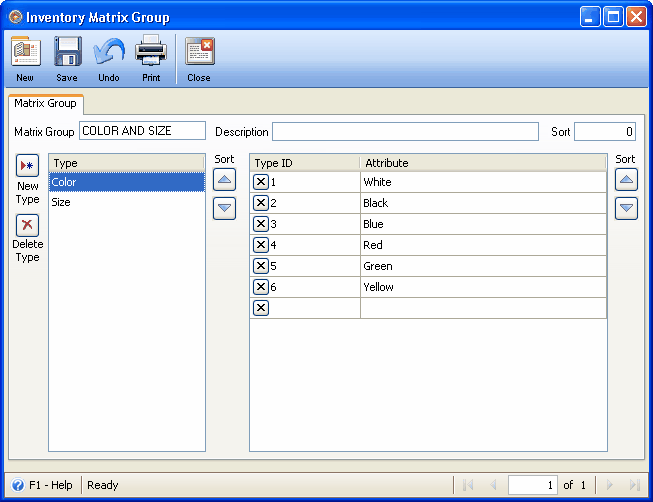
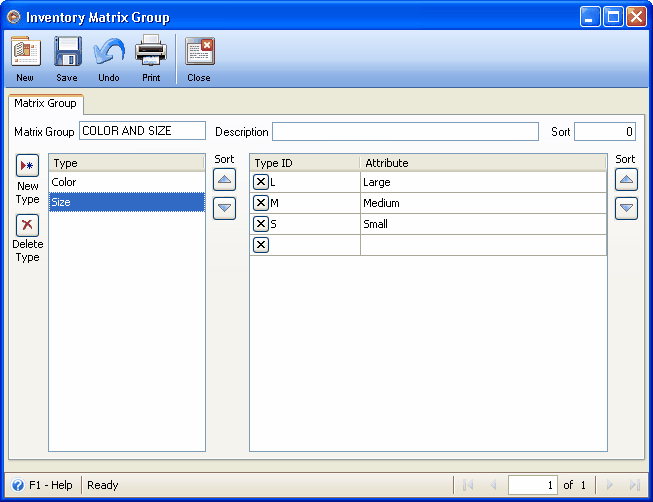
In the right grid you need to enter a unique Type ID for each selected Type along with an Attribute Name. You can enter an unlimited number of Type ID's and Attributes for each Type. In the example below there are 2 different Types (Color and Size) each with several Attributes. The Color Type includes 6 different color attributes and the Size type includes 3 different attributes.
Based on the below Color and Size group it would create different variation of the main item. There 6 colors by 3 sizes (6 colors x 3 sizes = 18 items).


Toolbar Buttons
Toolbar Buttons perform an action on the current record like adding, deleting or saving.
![]() The New button will allow you to create a new group.
The New button will allow you to create a new group.
![]() The Save button will save the changes made on this form.
The Save button will save the changes made on this form.
![]() The Undo button will cancel out the last change/s done to the record reverting it to its older state.
The Undo button will cancel out the last change/s done to the record reverting it to its older state.
![]() The Print button will open the Inventory Matrix Groups preview.
The Print button will open the Inventory Matrix Groups preview.
![]() The Close button will close the Inventory Matrix Groups form.
The Close button will close the Inventory Matrix Groups form.
Press F1 or click F1-Help button in the Status bar for help on how to use the form.